
Studio Acoustics: Perfect Acoustic Treatment
Discover the essentials of studio acoustics and learn how to craft the perfect acoustic treatment for your space. Enhance sound quality with effective acoustic insulation techniques.
DIGI Acoustics
Introduction:
Why Does Studio Acoustics Matter More Than You Think?
Have you ever walked into a studio and noticed how the silence speaks? Not an eerie silence, but a purposeful one. A silence that shapes sound, molds music, and defines clarity. But here’s the real question—is your studio helping your sound, or sabotaging it?
In an era where anyone can record from a bedroom, the real separator between amateur and professional is acoustic precision. Still, most creators spend more on gear than on the room they use it in. What if your expensive mic is picking up more room noise than voice? What if that perfect take is ruined not by performance—but by reflection?
Let’s explore how studio acoustics can become the unsung hero of your creative process.
What Are Studio Acoustics? A Sound Foundation
The Science Behind the Sound
Studio acoustics refer to the way sound behaves within a space. It’s the art and science of controlling how sound waves travel, reflect, absorb, and diffuse within a room. Every surface—walls, floors, ceilings—plays a part. Think of it like lighting for your ears: done wrong, everything looks flat; done right, everything shines.
"A great mix starts in a great room" — Anonymous Engineer Wisdom
The goal? Accuracy. Not volume, not bass, not echo—just honest, clear, clean sound that reflects what you actually recorded.
The Enemies of Sound:
Common Acoustic Issues
1. Flutter Echo & Reverberation
Ever clap your hands in a room and hear a fast, metallic ringing? That’s flutter echo, caused by sound bouncing back and forth between parallel walls. It can muddy up vocals and instruments fast.
2. Standing Waves
This occurs when sound waves get trapped between surfaces, creating areas in your room where bass is either too loud or completely gone. A nightmare for mixing.
3. Room Modes
Every room has specific frequencies it naturally amplifies or diminishes. Without treatment, your track could sound amazing in the room—but terrible everywhere else.
Designing an Acoustically Balanced Studio
1. Room Shape and Size Matters
Small square rooms? Challenging. Odd-shaped rooms? Often better. Why? Because irregular geometry helps break up sound reflections. If you’re building or choosing a space, go for asymmetry.
2. Absorption vs. Diffusion
Absorption (think foam panels or rockwool) reduces sound reflections. It's great for reducing reverb and taming mids and highs.
Diffusion spreads sound evenly across a room without killing energy, keeping the room alive.
Balance both. Over-absorb and your room will sound like a pillow fort. Under-treat and it's a reverb chamber.
3. Bass Traps: The Low-End Lifesaver
Bass frequencies are tricky—they build up in corners and mess with mixes. Bass traps (placed in corners and wall junctions) help control these rogue waves.
“If you can’t trust your room, you can’t trust your mix.” — Chris Lord-Alge
Acoustic Treatment Products and Placement Tips
Panels, Clouds, Traps, and More
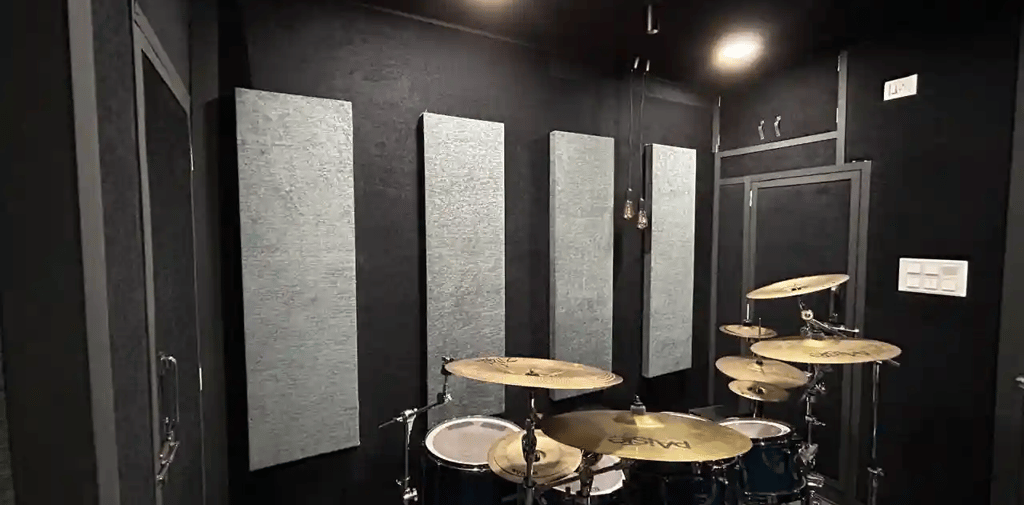
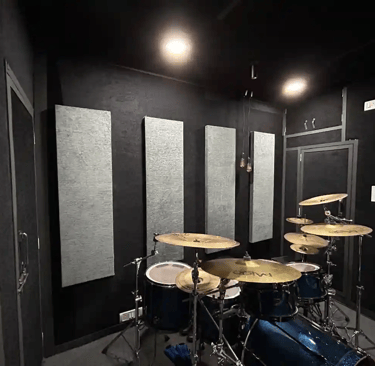
Acoustic Panels: Use them on side walls and behind your speakers to absorb early reflections.
Ceiling Clouds: Suspended panels that reduce ceiling bounce. Great for vocals and mixing clarity.
Corner Bass Traps: Stack these where two or three surfaces meet—typically front and rear corners.
Diffusers: Perfect for back walls to retain natural room tone while preventing harsh reflections.
DIY vs. Pro Installation
Yes, you can DIY treatment using mineral wool and fabric. But for pro results, expert layout and installation matter. Companies like DIGI Acoustics specialize in studio acoustics—blending performance with aesthetics.
Real World Results:
Transforming Your Creative Process
Imagine this: You walk into your studio. You record a vocal take. It sounds exactly as you imagined—clear, detailed, and powerful. You mix with confidence because what you hear is true. That’s the power of great acoustics.
It’s not about spending more—it’s about spending smart. That $500 mic will only shine in a $500-treated room.
And if you’re offering services or producing commercial work, remember: clients judge with their ears.
“A properly treated room turns you from a guesser into a decision-maker.” — Studio Owner, Hyderabad
Studio Acoustics Myths Busted
“Foam fixes everything.”
No—it only absorbs high frequencies. Your bass is still bouncing around.“I don’t need treatment. I have plugins.”
No plugin can remove poor recording space acoustics.“It’s too expensive.”
You don’t need a million bucks. Smart placement of panels and traps can revolutionize your room on a modest budget.
Conclusion:
Is Your Studio Helping You or Holding You Back?
We began with a question: is your studio working for your sound, or against it?
Frequently Asked Questions (FAQs)
1. What are studio acoustics and why are they important?
Studio acoustics refer to how sound behaves within a studio space. Proper acoustics ensure accurate sound recording and mixing by reducing reflections, echoes, and noise interference.
2. Can I improve studio acoustics in a small room?
Yes. Even small rooms can benefit from strategic acoustic treatment using panels, bass traps, and ceiling clouds to control reflections and enhance sound clarity.
3. What is the difference between soundproofing and acoustic treatment?
Soundproofing blocks external noise from entering or leaving a room, while acoustic treatment improves the quality of sound inside the room.
4. Do I need to treat all walls of the studio?
Not always. Focus on first reflection points, corners (for bass traps), and ceiling areas. A mix of absorption and diffusion can balance your space without over-dampening it.
5. How much does professional acoustic treatment cost?
Costs vary based on room size, materials used, and complexity. Basic setups can be affordable, while advanced studios may require custom solutions. Companies like DIGI Acoustics offer tailored packages to fit your budget and goals.
6. Can I use acoustic foam panels from online marketplaces?
Basic foam panels may help reduce high-frequency reflections, but they often don’t address low-frequency issues. Professional-grade materials are more effective and long-lasting.
7. Will acoustic treatment change the look of my studio?
Yes—in a good way. Modern acoustic solutions are available in various colors and finishes, enhancing both aesthetics and functionality.
8. How long does it take to acoustically treat a studio?
Depending on the room size and complexity, it can take anywhere from a few hours to a couple of days for complete design and installation.
9. Do I need a professional to design my studio acoustics?
While DIY is possible, professional acoustic designers ensure precise treatment, efficient material use, and aesthetic integration—saving time and delivering better results.
10. What services does DIGI Acoustics offer for studio acoustics?
DIGI Acoustics provides consulting, design, and full installation of acoustic treatment solutions including wall panels, bass traps, ceiling clouds, and customized setups for studios of all sizes.
Now you know—great studio acoustics are not optional. They’re foundational. They’re the invisible partner to your creativity. They allow your equipment to shine and your skills to flourish.
If you're serious about production, mixing, or content creation, it’s time to prioritize your space. Invest in treatment. Trust your ears again. Work with professionals like DIGI Acoustics who specialize in custom acoustic design and installation for studios.
So, what’s the next step? Are you ready to finally hear what you’ve been missing?
Let your room reflect your sound—not distort it.
Looking for expert acoustic solutions?
Contact DIGI Acoustics today for consultation, design, and installation tailored to your studio goals. Your sound deserves it.
we provide expert acoustics and soundproofing solutions
Important Links
+91 9100720404
© 2026 DIGI Acoustics. All rights reserved.
2-22-1/173/1, Bhagya Nagar Colony, Kukatpally, Hyderabad, Telangana 500072
Address